Self-adhesive laminates are designed to be easy to install, and in most cases, you can do it yourself with a few basic tools.
Here are some general installation requirements for self-adhesive laminates:
Surface preparation: The surface to which the laminate will be applied must be clean, dry, and free of any dust, dirt, or debris. If the surface is not clean, the adhesive may not adhere properly, resulting in bubbles or lifting of the laminate.
Measurement and cutting: Measure the surface to determine the amount of laminate needed. Cut the laminate to size using a straight edge and a utility knife, leaving a small amount of overhang on each side.
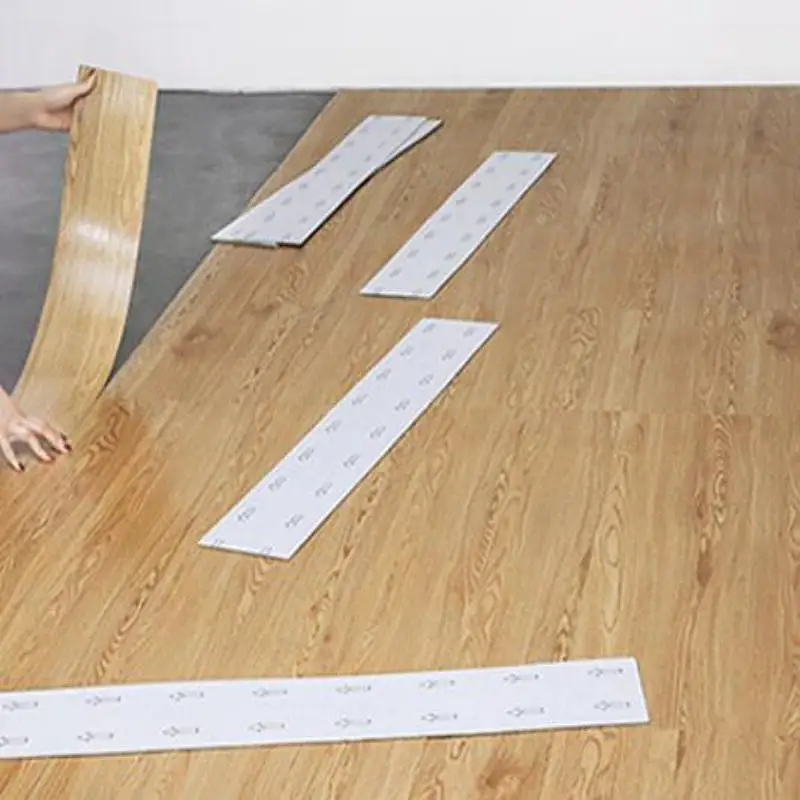
Applying the laminate: Peel the backing off the laminate and carefully apply it to the surface, starting at one end and smoothing out any bubbles or wrinkles as you go. Use a squeegee or a flat tool to help press the laminate onto the surface and remove any air pockets.
Trimming the edges: Once the laminate is applied, trim the excess material from the edges using a utility knife or a sharp pair of scissors.
Finishing touches: If necessary, add edge trim or molding to cover the edges of the laminate and create a seamless finish.
It’s important to follow the manufacturer’s instructions and recommendations for the specific self-adhesive laminate product you are using. Some products may have specific requirements for surface preparation, application, or finishing that differ from the general guidelines above.
Overall, self-adhesive laminates are a relatively easy and affordable way to add a protective layer to surfaces such as countertops, shelves, and furniture. With the right tools and preparation, you can achieve a professional-looking finish and enjoy the benefits of a durable, easy-to-clean surface.
What are some common mistakes to avoid when installing self-adhesive laminates?
Installing self-adhesive laminates can be a relatively straightforward process, but there are some common mistakes that can impact the final result.
Here are some mistakes to avoid when installing self-adhesive laminates:
Not properly preparing the surface: The surface to which the laminate will be applied must be clean, dry, and free of any dust, dirt, or debris. Failing to properly prepare the surface can result in poor adhesion and the laminate may start to lift or bubble over time.
Not measuring accurately: Failing to measure accurately can result in the laminate being too short or too long, which can cause problems during installation. self adhesive laminate bunnings This can result in gaps, overlaps, or wrinkles in the laminate.
Not cutting the laminate properly: Cutting the laminate too short or too long can also cause problems during installation. It’s important to use a straight edge and a sharp utility knife to cut the laminate to the correct size.
Not smoothing out bubbles and wrinkles: Bubbles and wrinkles can form during installation if the laminate is not applied smoothly. It’s important to use a squeegee or a flat tool to help press the laminate onto the surface and remove any air pockets.
Not trimming the edges properly: Leaving excess material on the edges of the laminate can result in a sloppy or uneven finish. It’s important to trim the edges carefully using a utility knife or a sharp pair of scissors.
Rushing the installation: Taking the time to properly prepare the surface, measure, cut, and apply the laminate can help ensure a professional-looking finish. Rushing the installation can result in mistakes and a subpar final result.
Overall, by avoiding these common mistakes and following the manufacturer’s instructions, you can achieve a professional-looking finish and enjoy the benefits of a durable, easy-to-clean surface that self-adhesive laminates provide.